Does anyone know anyone that could do some pattern grading FAST?? Someone with CAD??
Just asking.....
Does anyone know anyone that could do some pattern grading FAST?? Someone with CAD??
Just asking.....
Step 2- Lift flap and lay washer where other snap will go. Mark cutting lines in washer. Cut through both layers of front pocket.
Step 3- Push snap tabs through front of pocket. Put washer over tabs, and fold tabs to the sides.
Step 4- Snap is DONE!!! Whew-Hew!!
Step 5- Pinning Straps onto bag. On the front of your bag, measure 1 and 1/2" from edges of front pocket. Pin the strap in place. If you didn't use D-rings pin the end of the strap to the bag. 
Don't get confused here. You are pinning opposite ends of the same strap to the sides of front pocket.
(in the picture below it looks like I pinned them different distances....it's a trick. They are both 1 and 1/2" from pocket edge)
Step 6- Flip your bag over to the back side. Center your snap flap with the snap facing up, and pin into place.


Step 15- Press opening edges so that they match up with the top edge of the bag. Pin it closed.
And then
say "Hi" to your new
Isn't she sweet?
She even looks good in snow!!
Now, go stuff her full of all of your sunshine necessities....
and PLAY!!
ps. don't forget to post your pics on the Gracie Lou's Flickr group!!
Step 2-Press curve really well. Make sure that your whole front piece lies flat.
Step 3- Topstitch curves ta 1/8" and 1/4".Step 4- Take your Lining "B" piece and lay it face up. Place your completed "Front Pocket" piece on top of it.
Step 5- lay remaining bag body piece "B", face down, on top of this. PIN everything in place.Step 6- Stitch sides and bottom at 1/2".
Step 7- Cut corners away 3 and 1/2 inch from edges.
Repeating the same steps you took with the lining. (steps 7-10)
Step 8- Get ready to make your square bottom by matching seam allowances. before you do this make sure that when you open the corner to match the seam allowance, that you have opened it between the 2 outside fabrics (not the lining fabric).
Step 9- Sew across corner at 1/2". Press all seams flat against the bag.
Step 10- get your completed bag lining and press side seams flat against the bag. If you feel adventurous, topstitch the seam to the bag. It is a littls tricky.......but it makes the seam allowance lay so much flatter!
That is all for today! Tomorrow we will be putting the whole bag together!!
This has been so much fun for me. I really appreciate you all for playing along! Big Hug!!
**Step 3- Topstitch down both edges at 1/8".
** Step 4- Take this "strap" to your cutting board and cut it into four 3" chunks.
**Step 5- Thread each of the 3" pieces through a d-ring.
**Step 6- Sew across the strips as close to the D-ring as your presser foot will let you.
**Step 7- put your d-rings aside for now.
Step 8- Line up you Strap pieces with an accent piece in the middle. Sew them together with 1/2" seam allowance. Press seams flat.
Step 4- Cut on lines through only one flap thickness. The easiest way to do this is using you seam ripper, but you can do it with your scissors.
Step 5- Put the snap inside the flap, and thread the posts through the slits.
Step 3- Take one of your Lining "A" pieces and lay it right side up. Place your pocket on the lining, about four inches from the top edge. You can either center it with the ruler, or eyeball it. Pin the pocket in place.
Step 4- Stitch the pocket in place. I topstitch, at 1/8" and 1/4", around all 3 edges. Make sure to back track a couple of times at the top to secure the pocket.
Step 5- OPTIONAL- I divided the big pocket into to smaller pockets by sewing a seam down the center.
Yeah!! Pockets on!! Isn't it cute?? Of course it is.
***If you want to add more pockets to the inside of your purse now is the time to do it, before you go to step 6.
Step 6- Stack your other Interfaced lining piece "A" on top of your pocketed piece with the right sides of the fabric together. Sew sides and bottom with 1/2" seam allowance.
****Before you sew make sure that the opening of you pocket is facing the top of your lining.***(Yes! I have had MANY upside down pockets because I didn't check.)
Step 7- Place your sewn lining on your cutting board. We are going to cut the bottom corners out.
Measure up 3 and 1/2" and over 3 and 1/2" from the edge. Mark this angle with a pencil. Do this to both bottom corners.
Step 8- Cut on the lines, and remove the corner pieces.
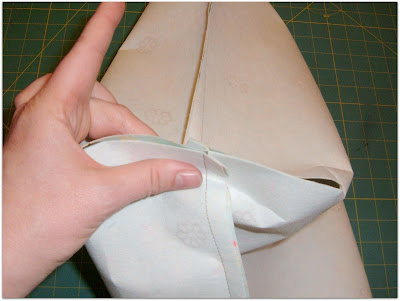
Step 9- Open the corners and fold them so that the seam allowances meet. I know that this may not make sence.....so hopefully the picture will clear it up.
Step 10- Pin in place. It helps if you fold the seam allowances in opposite directions. Sew across opening with 1/2" seam allowance.
Now do it again with the other corner, and you are done for today!
Are We Having Fun Yet??